Showing posts with label craft. Show all posts

Friday, 14 December 2012

I'll Be Home for Christmas

Hopefully, assuming we don't have a problem with our flight.  We are now all ready for Christmas - presents are wrapped, food for the hamper is made, Milly's rag doll is almost finished and the spare room has become cardboard box city from all the deliveries.  Must do something with those in the new year.  I'm thinking play shop.

This week we made biscotti (or sausage biscuits as miss likes to call them) and its a recipe from good food, so I'll just give you a link to that below.  We stuck almost to the recipe but I substituted cherry for cranberries, just because I like them.  We did, however, do a very very quick gift craft which makes a relatively low cost gift a little more personal.  Its another of those where you do most of the work, but such is life with kids and crafting.

Here Comes Santa Claus


You will need:

A vase big enough to put your entire hand inside
A sharpie (remember those from the labels?)
Paper and pens
Sticky tape of whichever brand you prefer

Cut your paper so its no larger than the height of your vase

Ask your child to draw whatever pictures you (or rather they) want.  Milly decided on Father Christmas, a snowman, a helicopter cat and a round Christmas tree. 


Cut out the pictures you want to put on to the vase (I decided on Father Christmas and the snowman, plus her name) and tape them on the inside.

Trace around with the sharpie.  You might need to do this a couple of times because the pen doesn't always draw that well.  I should imagine it would be better on a ceramic but then you have the faff of getting the picture on there in the first place.  Its one for us to do in future when Mill can be trusted to not draw a helicopter cat on something.

Remove the paper and allow to dry.  Jobs a good un.


I haven't tried to wash these so I have no idea if the picture is going to wash off the minute it touches water, but I don't think it really matters since they still have a vase at the end of it.

We've also been tagging and wrapping.  The bird seed feeders now look like this

Home made bird seed feeders
Bird Seed Feeders with a touch of Christmas Sparkle


and our Christmas hampers look like this (minus the bag of biscotti)

Small Christmas Hamper
Christmas Food Goodies


if you want a list of the recipes I've used here you go:
Spiced beetroot and orange chutney   This is lovely and can be done at last minute
Spiced plum chutney  I make this every year.  Its a bit late for it to be ready for Christmas but its still suitable for a gift with strict instructions to leave it for a few weeks.
Christmas Cake I make mine in October but there is no reason why you cant do a last minute version.

Champagne and Strawberry Jam  


This is my recipe and it makes an 8oz jar of jam .

You will need :

200g strawberries
180g jam sugar
1 large bottle of champagne (or cava)
1 lemon.
A saucer in the fridge

Chop the strawberries in to 4 and add to a pan with the sugar.  Leave for about an hour for the juices to start flowing (or don't if you're in a rush).  If you want big chunky strawberries at the end, leave overnight.

Add a squeeze of the lemon and about half a glass of champagne.  Get your saucer ready.

Heat gently to dissolve the sugar, stirring as you go, and then bring to the boil.for about 5 minutes (double check after four).  Remove from the heat and spread a little on the saucer, give it a minute and then push it about a bit.  It should be all jammy and thick and wrinkly when you push and not sloppy.  If you have slop, give it another minute or two and retest.

Allow to cool and then pour in to sterilised jam jars.

Drink the rest of the champagne to celebrate.

Christmas Biscotti / Sausage Biscuits

The biscuits are simply shortbread with 1/2 tsp of cinnamon and topped with cane sugar.

So, its been a busy old week.  There are other things I will show you in the new year but since they're gifts for people who read this blog they're staying under wraps for now.


So that just leaves me to say have a very merry Christmas and a wonderful New Year xxx


Monday, 10 December 2012

Rudolf the Red Nosed Reindeer

once gave Santa's sleigh a lift.  And when mixed in with maltesers, makes a really simple gift.

Move over Bernie Taupin, there's a new kid in town.

Reindeer Noses


You will need:

1 bag of maltesers
1 bag of either red foiled chocolate balls or a bag of mixed m&m's and a willingness to eat everything that isnt red.  yum.  If youre in the UK a rather large supermarket chain beginning with T and ending in esco sells the ones I've used.
1 cellophane bag per person


Lob 8 maltesers and 1 red chocolate of choice in to the bag.  Tie with your pre-prepared rudolf labels.  Go.  


Requires absolutely no adult help once a child is
a) able to count to 8; and
b) able to resist eating the majority of the maltesers.

So, should be fine once they hit retirement.  Maybe.

Merry Christmas, Love Milly


Frosty the Snowman

Was a jolly happy soul.  I find that hard to believe given how moody all snowmen look, especially that one on the advert that you know wanted diamonds but ends up with gloves.  The power of love aint that strong.

So, crafting.  A while back I saw the cutest little snowmen on pinterest and decided to make them as part of our craft.  Unfortunately the geek in me refuses to read anything which may appear to be an instruction and I went on the wing in theory.  It was about 30 seconds in to said winging that I realised this is not a craft to do with a 4 year old or a 30 something year old with limited patience for things that ping out of your fingers.  Here are the instructions if you really want them.  They do look cute after all.

Pin it


You will need
(per snowman)

2 small white buttons, each with two holes
4 black seed beads (plus another 10 that will end up on the floor / down your top / in your eye)
1 medium brooch fastening
Strong Glue
Two pieces of felt (colour is your choice, but I had green and red in with it being Christmas so went with the pinterest picture)
Assorted small sequins
A cocktail stick
A large stiff drink.


Down the drink.  You're going to need it.

Cut a hat and bow tie shape out of the coloured felt and place on one side.  Tell yourself that this is going to be great.

Glue the two buttons in place on top of the brooch, so one appears to be the head and one the body.  Still tell yourself this is going to be great.

Hand the brooch to your child along with some pva glue, the cocktail stick and the beads.  They have small hands so it should be good for them, right.  Wrong.  Quickly realise that there is pva glue everywhere, apart from in the place you want it to be and the snowman appears to be melting since his eye is now somewhere near his navel.  Stop lying to yourself about the great thing, throw that one away and start again.  Allocate your child the job of passing things to you.  With the cocktail stick, blob in some strong glue just inside the button holes and drop the beads somewhere near to them.  Push in place and leave to the side to dry.  Repeat for all your buttons whilst slowing losing the will to live.

Meanwhile, get your small person to stick a sequin on to the bow tie.  Put a blob of glue on to the back and stick in to place on the snowman.  Do the same with the hat.

Be thankful that the buttons only came in small packets, put something Disney on the TV and relax.

Homemade snowman button brooch
Malevolent Snowman Army


Wednesday, 28 November 2012

I'll have a blue christmas without you

I have a craft related injury thanks to a bit of a slip when machine quilting at the weekend (yes, that does hurt as much as you imagine) so one trip to a&e later and my finger is in a ridiculously over sized bandage which hinders my ability to do anything let alone craft.   So this week I am without hand meaing we went for a tried and tested craft that I know the small one can do almost entirely alone.  She just needs me to boil the kettle and the rest is down to her.

Rockin' robin


to save you searching back through the blog you will need
bag of bird seed
cookie cutters
one sachet of gelatine
straws
greaseproof paper

plus, to Christmas it up a bit

glitter
Christmas ribbon


This amount has made 6 large bird seed feeders and 4 small ones (so would probably make 7 large ones if you want them for gifts).   I wouldn't recommend making more than one sachet at a time because you want to make sure all of the seed is covered in gelatine.


Lay out a sheet of greaseproof paper on a flat surface.

Make up the gelatine according to the instructions on the packet and add the seed in.  Throw in a bit of glitter.

Chop up your straws to make holes for the ribbon.

Place your cookie cutter on the paper and sprinkle a little glitter inside.  The right way to do this is to put silver all over, pink at the top and blue at the bottom.  Anything else is wrong. FACT.  

You may need to wear a woolly hat at this stage to prevent glitter getting in your hair.


Fill your cutter with the sticky seed and press down with the back of a spoon.  Sprinkle some more glitter on top.  

Shove the straw in place and leave to dry overnight.  


We're at that stage now, so I'll do an update when they're dry.  We've also tried a little mini seed chain so if they work, I'll put a picture up.


Friday, 23 November 2012

Santa Baby

I have been an awful good girl Santa baby so if you could see your way to that light blue convertible that I ask for in song every year it would be great.  You can still keep the sable though.  I'd rather than wasn't slipped anywhere, let alone under my tree.

Thanks

This craft was inspired by something I saw on pinterest last year which we had great fun reproducing it on the back of a cornflake box covered in wrapping paper.  This year we've taken it a bit further and added a few bits meaning we got to sing the same song over and over and over and over...

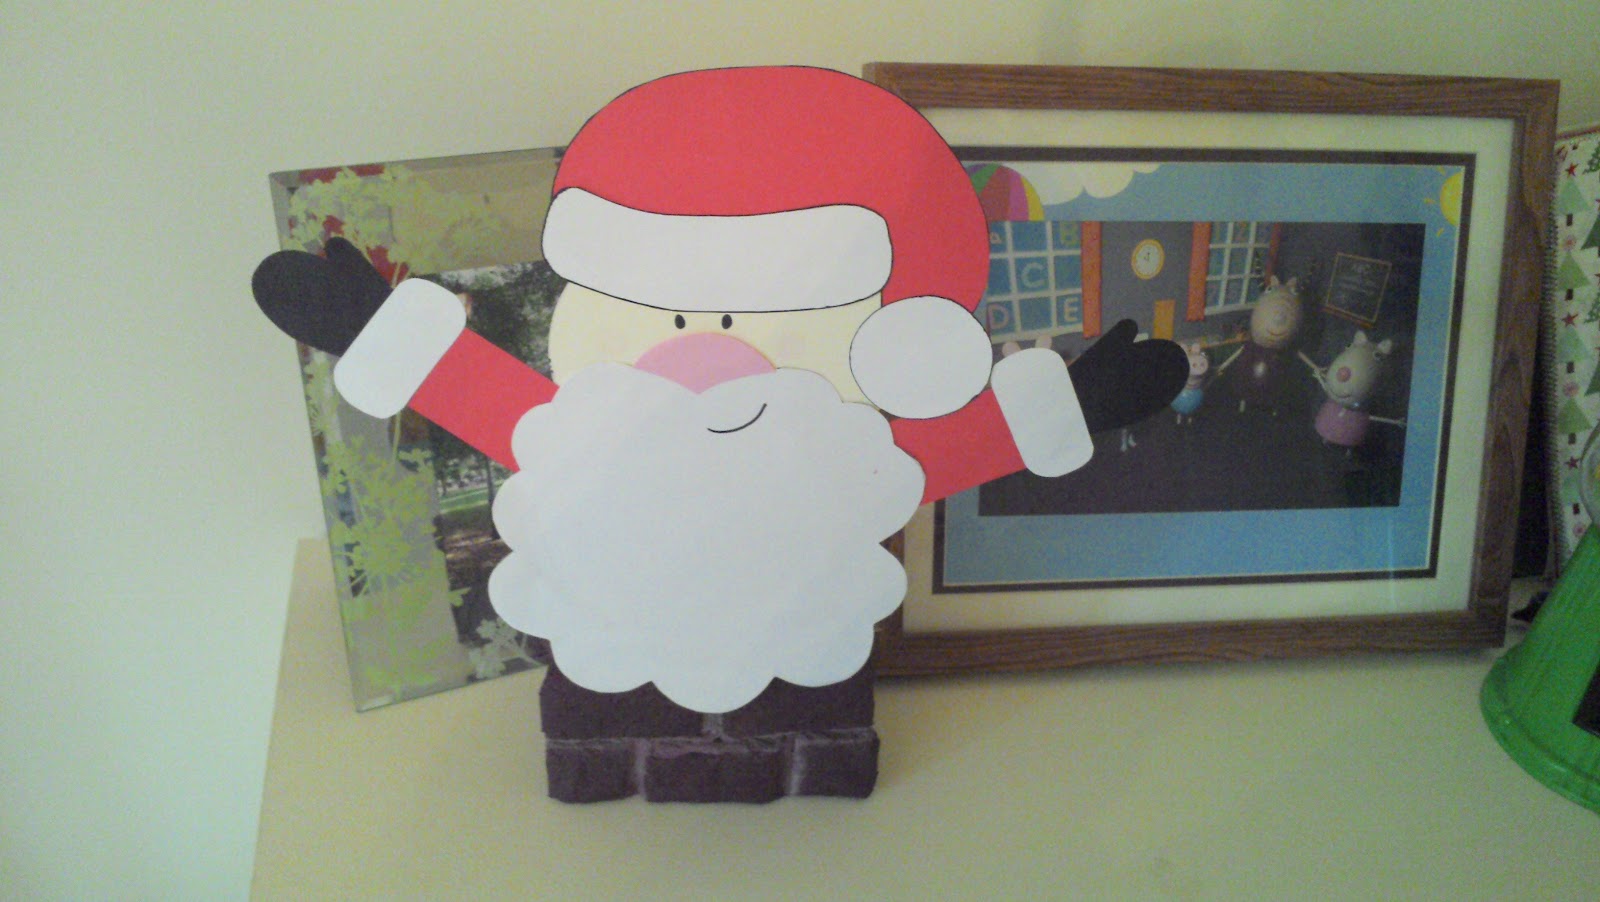
When Santa got stuck up the chimney


*sing it again*

You will need:
A teabag box 
4 or 5 pieces of kitchen roll
PVA glue
Paint
Assorted card (or white card that you are happy to paint)
Cotton wool
Sticky tape
A glue stick


First, prepare your chimney.

Open up your teabag box .  The lid is where we are going to stick our father Christmas later on so don't do anything to it.

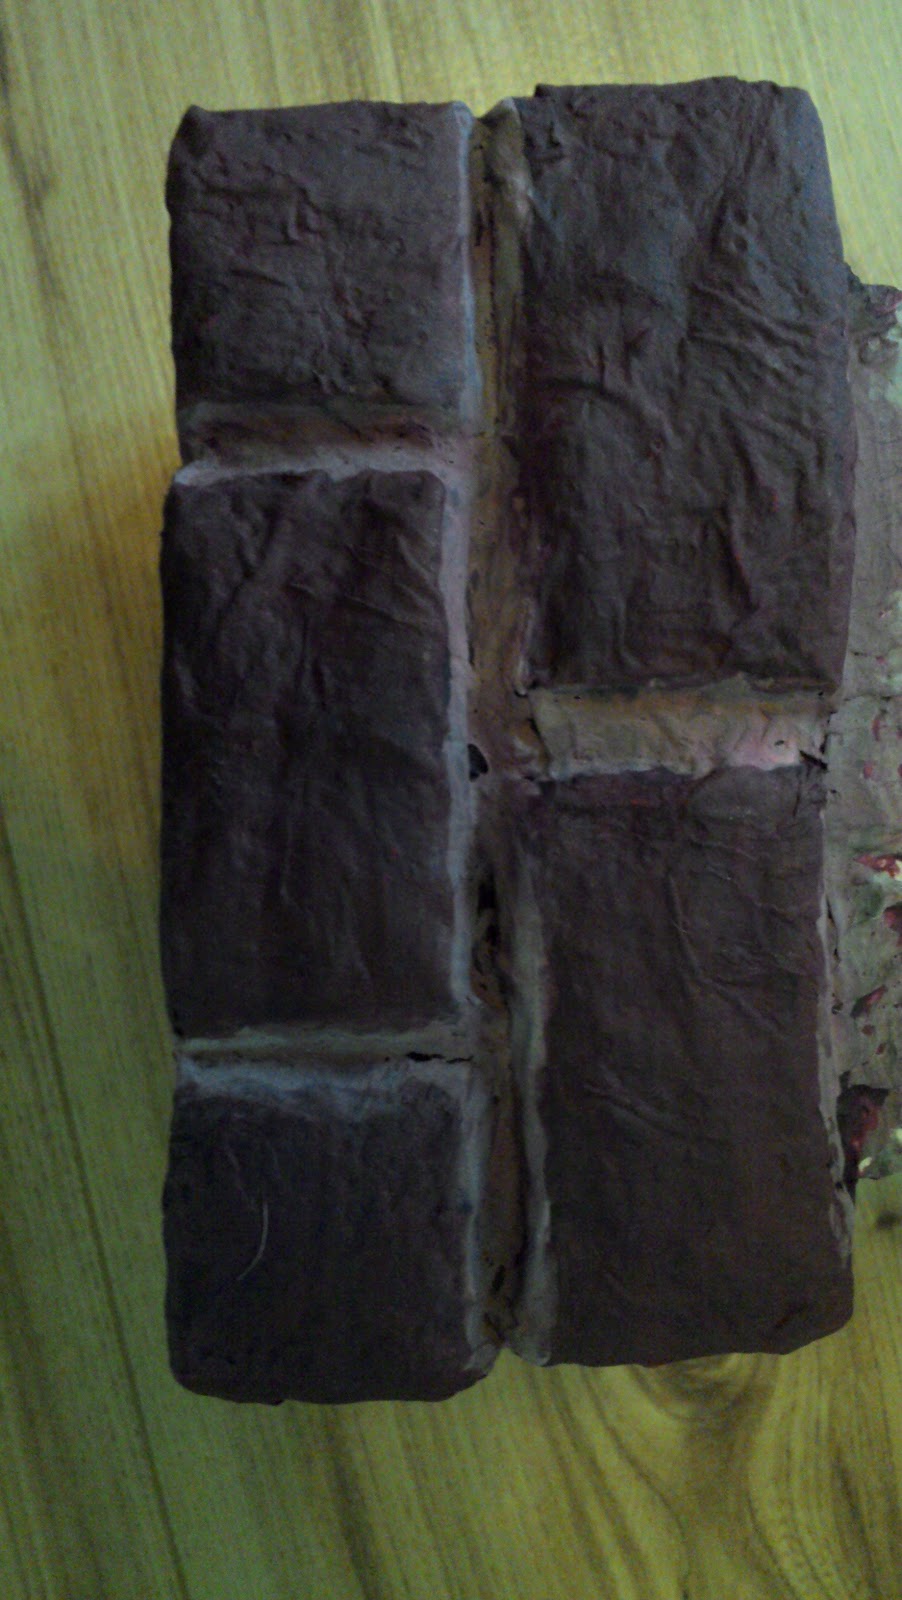
Cut brick sized bits of card from whatever scraps you have.  We decided to just do the front of the box.  I know Milly has limited patience for repetition so making 5 bricks is fine.  Making 20 bricks would result in me doing all the work.  Once cut make sure that they can be positioned as you want on the box.

Next cut strips the width of your brick from one of the pieces of kitchen roll, roll and stick on top of each card brick using the tape.  Once completed tape the lot in to place.


Rip up the rest of the kitchen roll.  Mix together equal parts of pva glue and water and use this to stick the kitchen roll all over the box and bricks.  We're going for texture here so don't worry if they make a mess of it - glue is fun!  Leave to dry.

Now we're going to make Santa

Spend 5 minutes explaining how Santa is the same person as Father Christmas and not his brother.

Draw yourself a FATHER CHRISTMAS on paper to get an idea of the proportions if you want.  Go for simple shapes which will be easy to cut out from card and stick together rather than complex arty stuff.  You can make any sort of face, body, position etc that you want to but make sure he has a great bushy beard.  Transfer your drawing to card, cut out and hand over to the small person to stick together.  Leave to one side.

Now paint your chimney any colour you want.  We went for real feel red brown with grey cement because Milly is a fan of things looking correct, even if they are made of bits of ripped up kitchen roll.   Leave to dry.  Ours dried a lot darker than expected so if this causes a problem, tell them the big man comes at night.


To assemble, simply stick father Christmas to the chimney and fill the back with 24 balls of cotton wool.

Santa wishes he was holding hands with peppa pig.

Father Christmas Advent Calendar


Each morning during December until Christmas Eve your small person can take a ball of cotton wool and stick it on his beard using  glue stick.  When the beard is complete that means ITS CHRISTMAS!!!!


We've also been making Christmas cake and chutney ready for Christmas hampers.  Mill was less than impressed with the colour and texture of fruit cake.


Saturday, 10 November 2012

Oh Christmas Tree

Remember the salt dough decorations from a couple of weeks ago?  Well we've now threaded them and beaded them.  Instead of lots of knots, I helped out with crimping beads and a pair of pliers and this is what we have

Salt dough Christmas decorations


Not bad for a bit of flour, salt and water.

Its beginning to look a lot like Christmas

Fortunately there are approximately 48 million Christmas related phrases out there, so I have lots of potential post titles.

About a month ago we started on our Christmas craft journey of spending far more making home made versions of things you can buy for 50p in the shops.  Still, it makes the small one happy and she gets to explore a bit of magic along the way.  In this case, embossing and the watch what happens when we apply heat factor.  Sometimes you forget to be impressed by the simple things so having a 4 year old makes you stop and wow right along with them.

Tagging, Xmas Stylee


(I'm hip with the kids)

You will need :
Assorted luggage labels 
Hole / ring reinforcers
Ribbon
A stamp 
An ink or embossing pad with powder
A heat gun if you are going to use powder
Stick on gems
A coloured sharpie


If you going for an ink pad and stamp, this is one you can leave entirely to the kids.  If you're using a heat gun its absolutely not suitable for them to do solo.  If you haven't used one before these things get extremely hot extremely quickly so keep the kids away.  And no, it doesnt work with a hairdryer.  Yes, I've tried.

This is a really simple one.  Take a label and stamp away.  If you're using embossing powder then its great fun watching your child applying invisible ink and then pouring magic glitter over the top of it.  Do not expect perfection, straight lines or even a neat label.  Do expect them to have great fun and want to stamp everything in sight.

When each one is finished, use the heat gun to activate the embossing powder if they're using that whilst they get on with the next label.

Next take two of your hole reinforcers for each label and, whilst still on the backing sheet, colour them in with the sharpie.  These things are great (and we'll be using them shortly on the next Christmas craft) because they don't run or bleed or make a mess when you accidentally rub your arm on them.  However, they are also very very permanent so watch your surfaces.  Leave these to one side to dry completely.

By now your ink should be dry or the powder should be cool, so take your gems and decorate the label.  We went for a very simple Rudolf theme so we stuck on a single red nose gem.

Home made christmas labels
Rudolf denied accusations of nepotism in the sleigh pulling interviews

Remove the strings and place a coloured hole reinforcer on each side of the label.  If you're lucky the ones that are stuck on already can be removed.  Ours couldn't, so we just stuck them on top.  Simple.


These are large labels because they will have information on the back.  More of that to come in the next few weeks...

Wednesday, 31 October 2012

Making Christmas, making Christmas

lalala

Yes, its still October and yes, I've said the C word.  I admit that I'm a bit of a Christmas maniac - I'm the type of person to put a tree in every space of our house and I fully intend to infect the small one with this fever so by the time she is a women in her 30s she will still get excited at the first holidays are coming advert on the tv.

We've actually been quite busy crafting over the last few weeks on Christmas gifts from Milly, but nothing is finished.  This is one of those spanning lots of weeks project so you will have to come back if you want to see the final product.  Its the lord of the rings of craft projects, if you will, only with fewer potential endings and no elves.  Ok, maybe elves.

Not bread again


...said Milly when I announced we were making salt dough

1 cup flour plus some for rolling
1/2 cup warm water
1/2 cup salt
1 tbsp oil (optional - I find it makes the dough easier to work with)

to make that in to a Christmas decoration

absolutely anything to cut out a shape
absolutely anything to make impressions in the dough (optional)
a rolling pin
assorted paint (we used a metallic paint from tesco, a gold glitter paint from ELC and some white paint from asda)
a decision on how to hang it and either rings or string depending on what you choose


Mix everything together and that's it really!  If its too dry shove in some more water, too wet add flour.  

We decided to make some impressions in the dough using some snowflake cutters I had for last years Christmas cakes and then cut out shapes with cookie cutters, but you could use just about anything really - finger print impressions and a circle cut using an egg cup would be great.


Once cut decide how you're going to hang them.  We're trying a combination of ribbons which require cuts in the shape, string requiring a hole (I used a cocktail stick to form this), and rings which I will buy at some point in the next couple of days and glue in place.  We had rather a lot of dough left at the end of our cutting so we made little beads too so miss can have a princess necklace.  Not sure Kate would wear a salt dough necklace but you never know.

Salt dough Christmas decorations


There are lots of cooking instructions on the web for salt dough.  I normally bake mine at 100 degrees for 3 hours (or until they are firm but not coloured in any way) but I wanted to try the microwave method.  For this you apparently simply place in the microwave for 1 - 2 minutes and bing they're done. Unfortunately I bing almost set my microwave on fire and bing made my kitchen smell of bonfires.   If you know how to do this without causing a major crisis then go for it.

Once cooked and cooled, its time to paint, and that's what today's activity was for us

Witch costume also optional


Next I will varnish them and then we will put them all together and attach them to the labels we've made (instructions coming soon).  But that's an activity for another day!  One without witches I imagine.


Tuesday, 16 October 2012

Happy Anniversary

6 years ago this happened


We had the perfect wedding and I married the perfect man.  Its all rather soppy really.  A couple of years before this happened mr invited me over to his place for an evening of fine foods, intellectual conversation and a drop of port towards the end of the evening (or maybe it was a bunch of mates getting drunk and playing twister).  At some point in the night he decided that dressing up in a tux, playing the ferrero rocher music and bringing in a tray of said choccies was a brilliant idea.

Regardless of the cheese, he won my heart and the rest is wonderful history.  Its a memory that needs to be celebrated so when I found out that six years together means a gift of sugar or iron I knew which one I was buying, and it wasnt made by tefal.

Why monsieur, you are really spoiling us


You will need : 

One polystyrene ball
One length of dowel
Plaster of paris
A pot
Tin foil
Clear glue
Assorted ribbons
Organza or tissue paper
64 ferrero rocher (which is a heck of a lot more than I expected).
The will power of an elephant

To start, I will say I bought a kit containing the ball, dowel, pot, plaster and ribbons.  I priced up getting everything individually and by the time I'd paid for p&p for each one it worked out considerably cheaper to get it in kit form from one place.  If youre making multiples for table decorations then it might be worth getting them seperately.  If that is the case, I used a 30cm length of dowel and a 120mm polystrene ball so adjust the number of chocolates if you buy smaller or larger.


Ok, this bit is pretty obvious but I'll go through it anyway.  Wrap and glue the ribbon around the dowel.  Prepare the plaster of paris as per the instructions on the packet and pour in to your pot.  Shove one end of the dowel in to the ball and sit the other in the plaster of paris and leave to set.

Now for the *ahem* fun bit.  Cover the ball in foil.  This will allow you to re-use (or sell on!) your sweet tree after you've finished with it.  Starting at the top add some glue to the back of the ferrero rocher and to the foil.  Hold in place until set.  Gravity will play its part in making this a tedious process unless you go foil-less, but you should be able to do 4 or so chocolates at a time and hold them all.  DO NOT EAT THE CHOCOLATE.  Continue until you've covered the entire ball and leave to set.  You will need to do this either the moment before you intend to give it as a gift or at least a day before because gravity will start to bug you once again by dropping the chocolates out of their wrappers, so DO NOT EAT THE CHOCOLATE - just glue them back in to place and feel better knowing that you will be sharing it eventually anyway.

Finish by decorating in any way you want.

Ferrero Rocher Sweet Tree


If you want a more budget option then melt a little milk chocolate and use that to stick maltesers on to the foiled ball, use cocktail sticks on marshmallows or licorice alsorts "kebabs", or just hoof lollipops in to the polystrene.  Its all sweets, so its all good.


Wednesday, 25 July 2012

I do believe in fairies

Milly is now at an age where the nightmares she has stay with her and she has started to develop a bit of a fear of the dark and of being left alone at night.  It breaks my heart to think of her scared of anything at this age so we've invented a story to help things along a bit.  For all of her love of cars and lego and traditional boy toys she is a real girly girl and loves fairies, so we've told her the fairies will come and take away all the horrible things she dreams of and keep her safe.  Of course they need a way of getting in to her room so I took something else I've seen on the internet and used it to our advantage.

Knock Knock...


I have no idea what these things are actually for or what they are supposed to look like, so apologies to anyone who comes across this blog knowing their purpose.

You will need:

Air drying clay
Paint
Varnish
Rolling pin
Sharp knife
Paper and pens

Draw out your design on paper.  You don't need to be an artist for this - you are simply drawing a door.  Think about the size of your wall or skirting board when you do this because it needs to fit in place.  Any type of door will do.

Roll out the clay to about 1/2 cm thick, put your drawing on top and, using a ball point pen or sharp pencil, draw around the outline.  Cut around the indentation.

Now add your extras.  We had a rather famous teacher in college and I only found out about that fact on the internet a few years ago, which shows just how little attention I paid to pottery.  As a result, I am rubbish!  So, I went for some easy bits and bobs and added a "stone" arch and base, a tiny window, letterbox, hinges and door knob, a small plant, a few roses, a couple of butterflies and a ladybird.  If I was doing it again, I think I'd leave out the plant.

Leave to dry.  The packet I used said allow 3 to 4 days but mine was dry within 24 hours.


Once dry paint however you want.  Since I am a typical toddler parent I have absolutely loads of ready mixed poster paint in, so I used that.  It needed a few coats but its cheap and easy stuff to use.

Once again, leave to dry before gluing all the pieces together and varnishing.  If you want to add any glitter do so when the varnish is wet.  Wait for it to be completely dry before adding embellishments.


If I was going to do this again I would probably use normal modelling clay rather than air drying simply because it does dry out exceptionally quickly, which makes any smaller pieces difficult to create as it crumbles in your fingers.  I also wouldn't use my beloved global knife which has the end broken off it due to the fact that my husband thought it was the best tool to break a block of ice.  I'd probably get something a lot sharper for cleaner lines.

Wednesday, 18 July 2012

L-O-V-E Love

6 years ago I made the invitations to our wedding celebration.  Hoarder that I am, I still have most of the things I bought for them including a small heart paper punch and they're all kept together in one of our kitchen larder units which has been taken over by craft items.  Milly spotted it for the first time and, silly woman that I am, I showed her how it worked.  Of course these objects are not made for the finger strength of a 3 year old so I punched a few hearts for her.

DO IT AGAIN!!!!!

I decided that if I was going to punch holes in to ever item of paper in our home we may as well do something with it.

All you need is love


...and a heart shaped paper punch
and coloured paper
and something to mount them on
and glue
and a pencil 

Punch so many hearts out the coloured paper that you lose the feeling in your thumb


Draw a heart shape on to your mounting material.  We used black foam because its what I had to hand.

Fill the heart shape with glue and stick your little hearts in place.  Smaller children might need some help with the heart outline.  Continue until you have filled all spaces with mini hearts.

We decided to frame our picture, but it would work really well on a card.  If you have more time then a series of hearts on a large card would make a lovely picture.


Here Comes the Sun

do do do doooo


You know how you go to the loo and the phone rings, or you buy the dress you've been looking at for ages only for it to go in to the sale the next week?  We're talking about the sort of thing Alanis Morissette would turn in to a mislabelled song.  Well, today I am daring Mr Sod to do his best with that law. 

Its been months since I was able to hang out a full load of washing without sky watching and keeping my fingers crossed the rain would stay off long enough for it to dry, so I am certainly not in need of enough pegs to fill my line.  If we suddenly find that summer hits next week you know who to thank.


When is a peg not a peg?

You will need:
Assorted wooden pegs
Paint and brushes
A black marker pen
Assorted glitter, glue, sequins, gems (optional)
A plastic plant pot, empty tin or cardboard frame shape (optional)

Take whichever item you are going to peg (the pot, tin or frame) and work out how many pegs you will need to cover the area completely.

Set out all of your pegs and paint assorted designs on them.  If you have time then paint them on both sides and on the inside.  Ours is a bit limited today but the beauty of this is that you can always unpeg them and do more another day.

Once they are dry, outline any painted shapes with the marker and add the embellishments as required.


Clip in place on your chosen item.  Alternatively use on a ribbon / string notice board, attach a magnet to the back and use as a picture / note holder or glue on to a baton to hang small items from (ideal for childrens necklaces and bracelets).

We turned ours in to a paint brush pot


At some point we will take them all off and paint the inside, but thats a craft for another day.

Monday, 16 July 2012

Feed the birds

Unfortunately for slightly more than tuppence a bag.

The holidays are little more than a distant memory, the tan has faded and I'm thinking about turning ark building in to a Wednesday craft.  So, its back to crafting and blogging to fill our rainy days.

Since we've been away the weather has turned my postage sized garden in to something of a jungle and we have rather a lot of visitors of the feathered variety.  Now I'm not the biggest fan of birds - they fall in to the general category of things that are nice to look at but may fly in to my face - but the small one likes them and our first floor living room means we get a good view without fearing some sort of Hitchcock style open air attack.  Besides, I like to live life on the edge from time to time so lets encourage them.

Who needs Mary Poppins anyway.

You will need:
Pine cones
Bird seed
Twine
Peanut butter, suet, honey or d) all of the above.
Gelatine (I read on the internet that this is fine for birds so I hope this is true!)
Assorted cookie cutters
Greaseproof paper
Trays
Straws chopped in to 4
Food colouring (optional)
A tall person

Basically this little lot

Easy one first.  

Tie some twine around a pine cone and leave enough length to be able to tie easily around a something. 

Base your decision on which sticky stuff to use on the likelihood of finger licking and mix together some of the seed.  

Shove in to the pine cone and squish together with your hands to form a ball and ask someone tall to hang in a tree.  

Milly is all about instant gratification so she liked that she was able to put these out straight away.


Bit more fancy pants one.  

Mix a packet of gelatine as per the instructions on the packet and allow to cool slightly. 

Add enough of the seed so it is coated but not wet (for us, that was about 700ml in a jug).  If you want to colour the seed do so at this stage by adding a couple of drops of food colouring.  We went for pink of course.

Line a baking tray with greaseproof paper and set out your cutters. Smaller cutters tend to make more mess so if that's what you have you might want protect any fabric surfaces first because this stuff is about to go everywhere.

Fill each cutter with the sticky seed and press down firmly with the back of a spoon.  Push a straw in to each shape and allow to dry (for us this took a couple of hours). 

Home made bird seed feeders


Gently push each seed shape out of the cutter and remove the straw.  If they're still a bit soft, stick them in the fridge to harden up completely.  Tie the twine through the resulting hole. 


Home made bird seed feeders
They stay inside until that rain stops


This would make a nice gift if you replace the basic twine with something like ribbon or brightly coloured string.  You could even do a rainbow of colours or wire up shapes inside of shapes with a bit of patience (so that would be us out).

If anyone who looks like Tippi Hedren turns up, leg it.


Thursday, 7 June 2012

Holidays are coming, holidays are coming

Even thinking about that advert makes me smile.  I am a complete diet coke and Christmas addict, so its my idea of heaven.  Clearly its June so no coke truck is heading my way and instead we're off on our first family seaside holiday.  Milly is almost falling over herself with excitement and the idea of having her own pool so getting her to do anything other than talk about swimming has been a task and a half.  Unfortunately for fish girl its fathers day and my mums birthday when we are away so she's had to do something not related to water.  For me, the problem was finding something that wasn't baking and wasn't bulky, so we went with the card that doubles as a gift by creating a fridge magnet...

Smile please


You will need:
1 willing child
1 sheet of magnetic paper
1 card blank
A camera
A pc and printer
Assorted embellishments
A way of attaching the magnet to the card - we went for a mini peg

Ask your child what they want to say in their card.  Ideally you're looking for 3 or 4 words that aren't can we go swimming, are we going swimming now or I can swim with one armband.  Clearly that's far too many words.  We settled on I love you daddy.

For each word decide on a picture that represents that word.  You can go for the easy option of holding signs, go for YMCA style cheerleader letters (Give me an I), act out the word or use props.  When I told the small one that I would be taking a picture of her making an I, she grabbed her magnifying glass.  Kids will often think of something much more interesting than us mere parents.


Once you have your pictures, shrink them to about 25% (or they will probably be too big to do anything with unless you have a super duper uber amount of memory), and line them on top of each other photobooth style

Print on to your magnetic paper and cut to size. 

Then you just need to attach to the front of your card and decorate as you wish.  I had some star beads so wrote daddy on the front with a sharpie.  Mill is very excited about reading at the moment so this appealed to her.  

Home made magnet card


We've also gone for a useful home made gift.  The hippy in me is rather in to upcycling as those who follow me on pinterest will know.  Unfortunately the things I find that look great would require me actually buying the products brand new to upcycle, which probably defeats the point of this exercise (hanging monkeys bowl I'm looking at you).  Since I have zero ability to let go of the small ones baby clothes I decided to do something useful with those.

When is a dress not a dress?

Now, I made a bit of a faff of this I admit, so there will be a round two with real instructions.  But here is the theory...

You will need:
2 / 3 different fabrics - I used a pair of the small ones jeans and her old dress
A sewing machine and cotton
Fabric paint (I used dylon 3D)
Dressmakers carbon paper
Snap fastening or velcro

Fabric 1 (outside main colour) : 6 inch x 4 1/2 inch square (x 2), 3 inch x 2 1/2 inch square 
Fabric 2 (outside border colour ) : 2 1/4 inch x 4 1/2 inch square (x 2), 3 inch x 2 1/2 inch square
Fabric 2 or 3 (lining) : 8 inch x 4 1/2 inch square (x 2)
hem width : 1/4 inch


Sew together the two small squares of fabric.  Trim the bottom corners and turn the correct way around.  This will form our fastening.

Sew each of the three types of fabric together.  The fastening should be sewn in place so it sits on the outside of the case and flaps down.

If you want to make a padded case, you will need a piece of fusible bonding or lining fabric and place behind the lining fabric.

Once you have two long pieces of the case place face together and sew around 3 edges, leaving the top lining edge open.  Iron the hemmed edges and turn the right way around . Sew the lining edge. 

Iron the top edge of the case so the lining sits correctly and add the fastening to the edge of the fastening square so the glasses are secure.


Once you have all of that you can decorate it (or not - the next one I make will be for me and wont have kiddy pictures on it).  I asked the small one to draw a picture of daddy which I then transferred on to the fabric with the carbon paper and painted over.

Upcycled sunglasses case


Holidays really are coming!!!

Sunday, 6 May 2012

The daddy gift array part 4

About a million years ago when I was a child, the absolute highlight of breakfast time was the toy you got in with the breakfast cereal.  My favourite of these were shrinky dinks - small pictures which you coloured in and then put in the oven to shrink (hence the name).  I have no idea what you were supposed to do with these after this point but I still loved them.

So imagine my utter joy when I saw shrinkies paper and packs in my local hobbycraft a few months back.  They were instantly assigned to my I'm using those at some point brain file - I just needed a reason and a project.

Awww, its a teeny weeny me hand

Shrinkies A4 paper
Pencil crayons
Paint (any type that will produce a hand print)
Scissors
One keyring attachment and ring 
A big fat book
A hole punch
An oven
A child

Paint your childs hand and print on to the rough dull side of the paper.  We used paint designed for handprints from ELC and it didnt dry particularly well, so if I was doing it again I'd probably go for something else.

Cut around the hand leaving a good sized border and use the punch to make a single hole.

Put in to the oven according to the instructions on the pack.  The first time I did this in our fan oven it blew like crazy and stuck together so had to go in the bin.  The second time I turned the tray every 20 - 30 seconds.  It takes a couple of minutes before the print goes flat. 

Remove from the oven and shove a book on the hot plastic (Jamie Oliver books work well I have found).  This will ensure its flat (ish).

Allow to cool and add the key ring thingy.

I think we're going to try assorted colour prints and magnets next time.


Better than hallmark (maybe)

Stage one and we already have options

1. Have your child draw a picture directly on to the shrinkies paper and colour it in
2. Know that you have one of those 'if this goes wrong in the oven you will never draw another picture again' children and have them draw on to paper and transfer this on to pc and print (obviously you'll need a method of doing this and a printer for this option!)

I went with option two.  Milly is *that* child.  I also did it in two parts - first she drew the black and white outline which I scanned, fixed up with GIMP to make it darker (if you want to do this then look for a levels tutorial - it basically involves moving the little arrows to the right of the peak around a bit).  Then she coloured in this printed version and I re-scanned, fixed the levels and then printed on to the shrinkies paper.  The only problem with doing it this way was that the background has a slightly strange colour to it, but I can pretend it was intentional.

Cook as above and leave to cool and you get something like this


Now its over to the small people to stick to a card and decorate as only their crazy little selves can.


I hope he likes it!  I always get very nervous about these things.

Sunday, 29 April 2012

I made that

I need to start a new pinterest board.  I've been pinning on there for quite some time and I've built up collections of some very nice things.  Unfortunately most of them remain unmade - a mere possibility that gets pushed further down the page.  A new board will be the incentive to actually do some of these things.  It starts like this...

Its been raining for approximately forever.  We're confined to the house by a combination of illness, lack of facilities and the fact that we don't own an ark.  So, I've decided to face my fear and actually make something.

I pinned this tutorial a while back and I've always loved this dress (how cute is that little girl!)
http://prudentbaby.com/2010/09/baby-kid/snap-wrap-dress-2/

We're off for our first family sun holiday in a few weeks and I wanted something easy and lightweight that I can throw in a bag and easily dress her in when she's covered in beach.

I changed the pattern slightly.  I wanted the lining to be a different colour, mainly because I'd bought it already, and I decided on narrow straps.  This was a mistake!  Not the lining part because I rather like that, but I think I spent best part of Lilo and Stitch pushing those babies inside out.  Definitely go wide!  The other massive mistake I made was using a little coffee table to not only cut the pattern but also to sew.  My back officially hates me and my hems are a little, well, out shall we say.


For my first effort at big girl sewing, I'm pleased enough with the result and the small one likes her dress rather a lot.  Next time I will definitely use a table large enough to actually lay out the material.

I'm thinking of adding a little felt flower on the fastening at the top but this depends on time more than anything else.  In the mean time, Milly has decided on her own accessories.

Monday, 23 April 2012

101 things to do with tissue paper flowers

Well, 2 to be exact.

This might even be better than the basket.  Surely not, I hear you cry.  Read on crafters...

Least practical hat in the world

At some point in toddler life there will be a requirement to make a hat for some sort of easter, summer, the local paper is sending around a reporter festival.  Plastic flowers are expensive so we took to the tissue paper again and prayed for a dry day.  Now, you dont want any common or garden tissue paper flower hat for your child.  What you want to do is add bees! 

One hat of your choice
Assorted tissue paper flowers
Polystyrene balls
Kebab sticks and playdoh (this is just to hold the balls, so anything pointy will do)
Yellow paint
Black pen
White paper
Pipe cleaners
Glue
Needle and thread

Shove a kebab stick in to the end of three polystyrene balls and hold in position with the playdoh.  Smile at the level of concentration on your childs face as they paint these balls yellow.

Milly paints bees
Milly paints bees

Once dry, draw a black stripe across the body, cut out some wing shapes on paper and glue in place.  Depending on the age of your child you may have to do the cutting and striping for them.

Attach your wonderful paper flowers around the edge of the hat and green paper "but flowers need leaves mummy".  Add an assortment of rubbish that your child insists must go on the hat.

Shape the pipecleaner as you wish and then shove one end in to the bee.  You might need to glue this in to place.  Sew the other end of the pipe cleaner to the hat and you have this

Easter bonnet

and yes, the hat made it in to the local paper with one grumpy looking child under it.

A bunch of flowers to last a lifetime, or this ones for the dads

The natural progression from the ability to make a tissue paper flower has got to be making a bouquet of them.
Tissue paper flowers
Green tissue paper
Drinking straws
Glue

if you want extra daddy points, add a vase

Empty toilet roll
Tissue paper
Glue mixed in with an equal quantity of water

The flowers:

Make a 5 or 6 large multi coloured flowers.  Let your children use their imagination when it comes to the colour combination.  Reality isnt the keyword for this project.

Wrap a length of green tissue around a straw, leaving some excess at the top and glue to secure.  

Stick the flower to the excess green tissue.  Gasp in amazement at the wonder you have created.  Do it until all the flowers have stems, gasp each time.

The vase:

Rip up shreds of tissue paper and stick in to place with the glue-water combo.  Continue until all of the roll is covered and leave to dry (which with a toddler means hunting around for a hair dryer and using that).  Place the flowers in to the vase.  Add an assortment of rubbish that your child insists must go on the vase.