Showing posts with label some adult help. Show all posts

Wednesday, 28 November 2012

I'll have a blue christmas without you

I have a craft related injury thanks to a bit of a slip when machine quilting at the weekend (yes, that does hurt as much as you imagine) so one trip to a&e later and my finger is in a ridiculously over sized bandage which hinders my ability to do anything let alone craft.   So this week I am without hand meaing we went for a tried and tested craft that I know the small one can do almost entirely alone.  She just needs me to boil the kettle and the rest is down to her.

Rockin' robin


to save you searching back through the blog you will need
bag of bird seed
cookie cutters
one sachet of gelatine
straws
greaseproof paper

plus, to Christmas it up a bit

glitter
Christmas ribbon


This amount has made 6 large bird seed feeders and 4 small ones (so would probably make 7 large ones if you want them for gifts).   I wouldn't recommend making more than one sachet at a time because you want to make sure all of the seed is covered in gelatine.


Lay out a sheet of greaseproof paper on a flat surface.

Make up the gelatine according to the instructions on the packet and add the seed in.  Throw in a bit of glitter.

Chop up your straws to make holes for the ribbon.

Place your cookie cutter on the paper and sprinkle a little glitter inside.  The right way to do this is to put silver all over, pink at the top and blue at the bottom.  Anything else is wrong. FACT.  

You may need to wear a woolly hat at this stage to prevent glitter getting in your hair.


Fill your cutter with the sticky seed and press down with the back of a spoon.  Sprinkle some more glitter on top.  

Shove the straw in place and leave to dry overnight.  


We're at that stage now, so I'll do an update when they're dry.  We've also tried a little mini seed chain so if they work, I'll put a picture up.


Friday, 23 November 2012

Santa Baby

I have been an awful good girl Santa baby so if you could see your way to that light blue convertible that I ask for in song every year it would be great.  You can still keep the sable though.  I'd rather than wasn't slipped anywhere, let alone under my tree.

Thanks

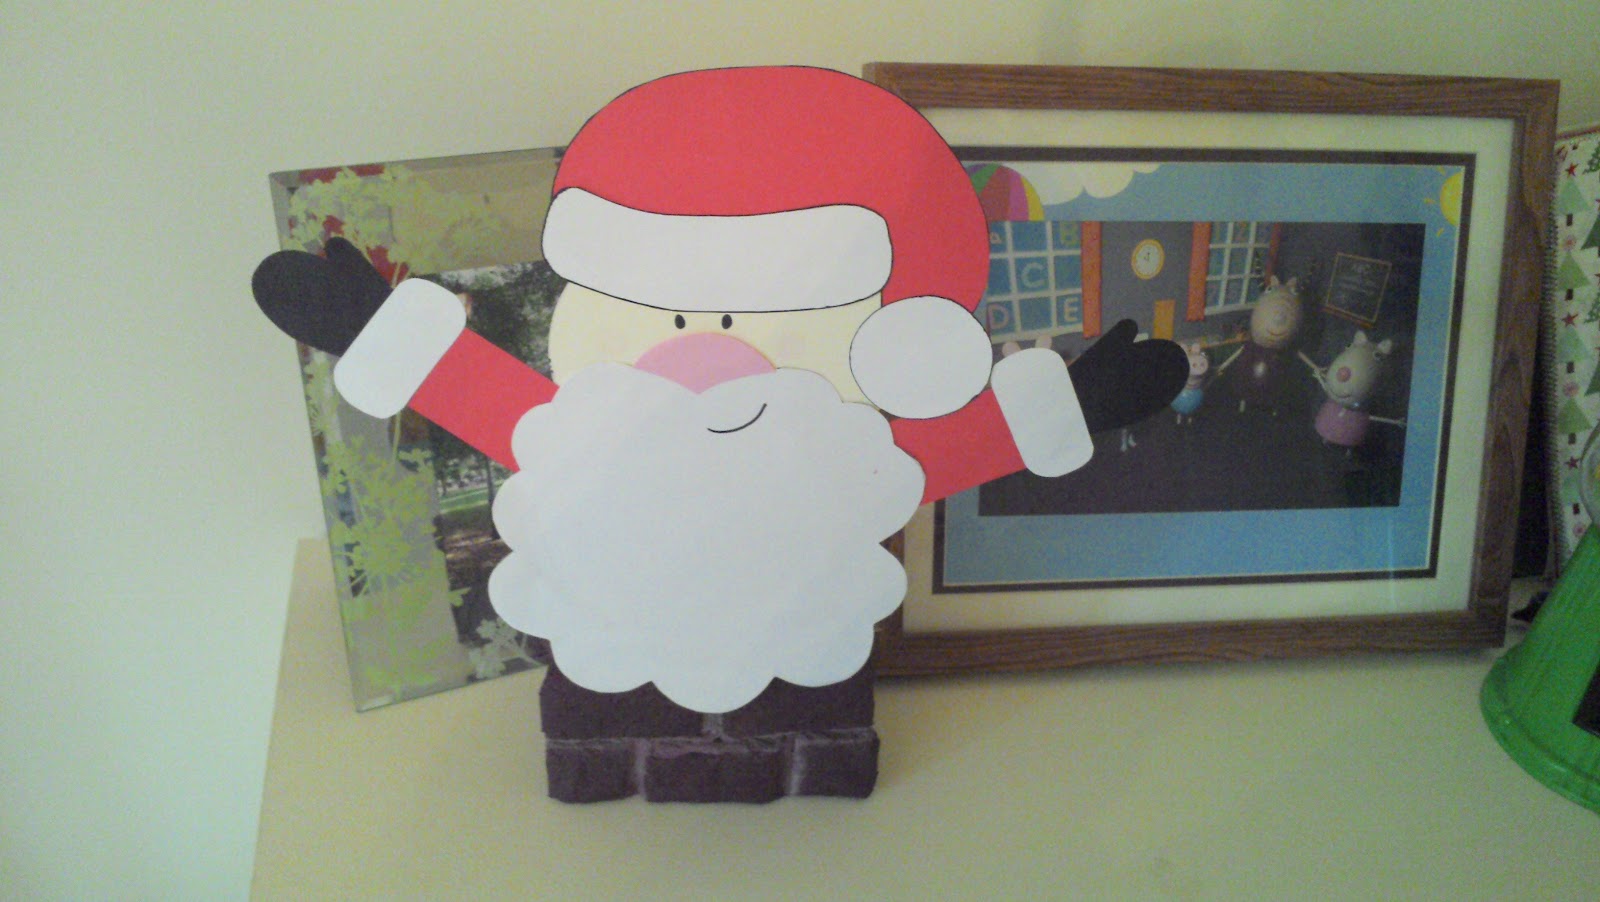
This craft was inspired by something I saw on pinterest last year which we had great fun reproducing it on the back of a cornflake box covered in wrapping paper.  This year we've taken it a bit further and added a few bits meaning we got to sing the same song over and over and over and over...

When Santa got stuck up the chimney


*sing it again*

You will need:
A teabag box 
4 or 5 pieces of kitchen roll
PVA glue
Paint
Assorted card (or white card that you are happy to paint)
Cotton wool
Sticky tape
A glue stick


First, prepare your chimney.

Open up your teabag box .  The lid is where we are going to stick our father Christmas later on so don't do anything to it.

Cut brick sized bits of card from whatever scraps you have.  We decided to just do the front of the box.  I know Milly has limited patience for repetition so making 5 bricks is fine.  Making 20 bricks would result in me doing all the work.  Once cut make sure that they can be positioned as you want on the box.

Next cut strips the width of your brick from one of the pieces of kitchen roll, roll and stick on top of each card brick using the tape.  Once completed tape the lot in to place.


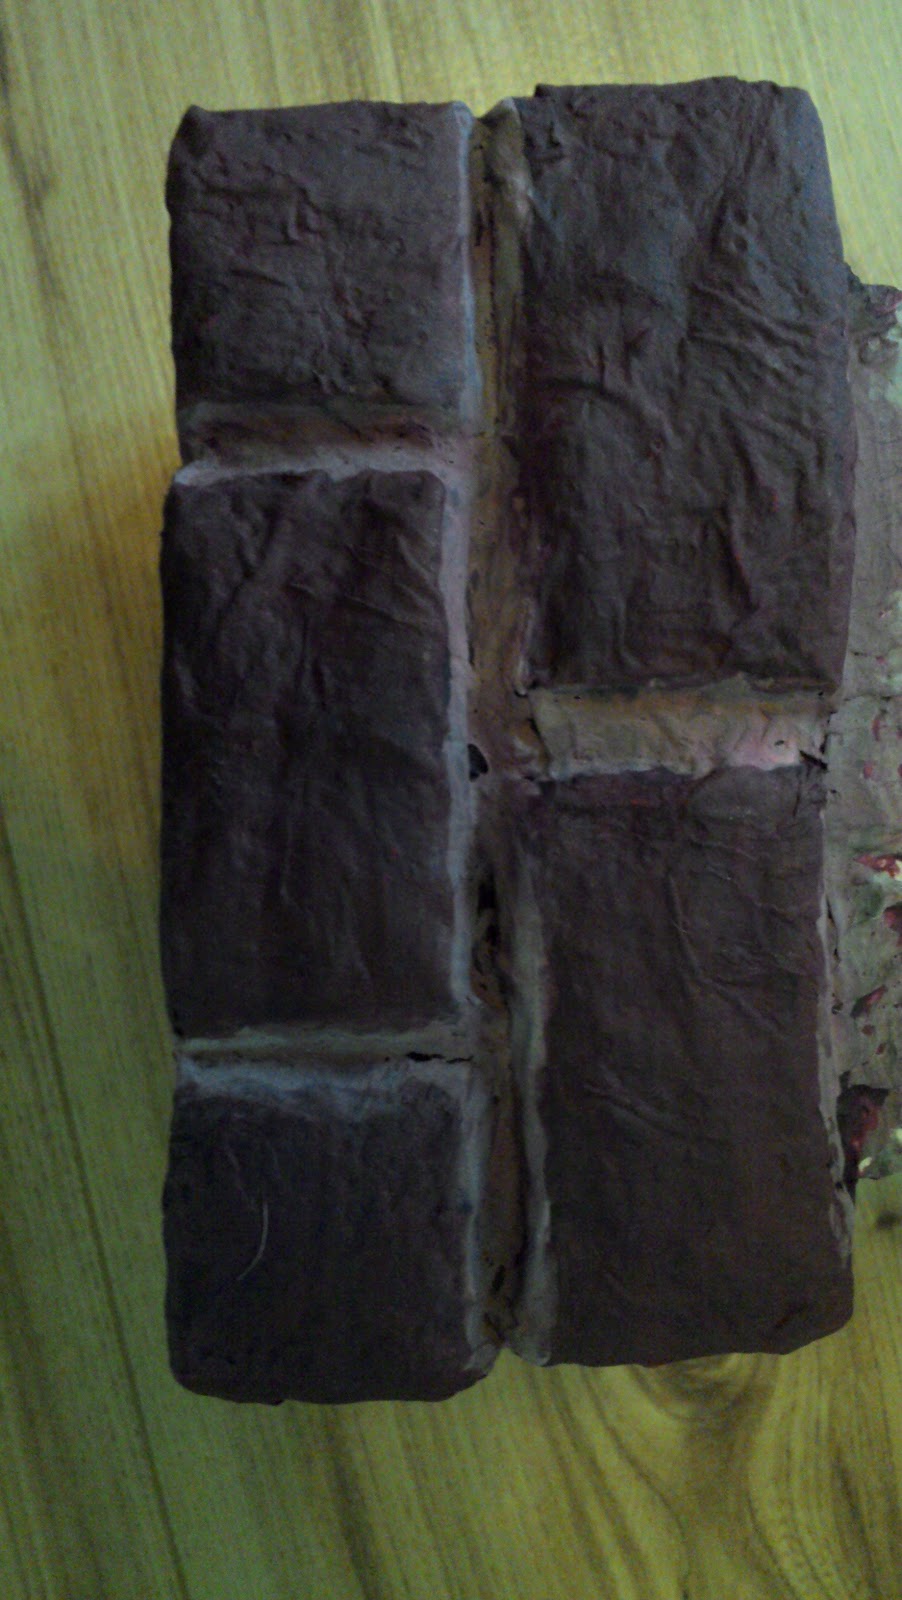
Rip up the rest of the kitchen roll.  Mix together equal parts of pva glue and water and use this to stick the kitchen roll all over the box and bricks.  We're going for texture here so don't worry if they make a mess of it - glue is fun!  Leave to dry.

Now we're going to make Santa

Spend 5 minutes explaining how Santa is the same person as Father Christmas and not his brother.

Draw yourself a FATHER CHRISTMAS on paper to get an idea of the proportions if you want.  Go for simple shapes which will be easy to cut out from card and stick together rather than complex arty stuff.  You can make any sort of face, body, position etc that you want to but make sure he has a great bushy beard.  Transfer your drawing to card, cut out and hand over to the small person to stick together.  Leave to one side.

Now paint your chimney any colour you want.  We went for real feel red brown with grey cement because Milly is a fan of things looking correct, even if they are made of bits of ripped up kitchen roll.   Leave to dry.  Ours dried a lot darker than expected so if this causes a problem, tell them the big man comes at night.


To assemble, simply stick father Christmas to the chimney and fill the back with 24 balls of cotton wool.

Santa wishes he was holding hands with peppa pig.

Father Christmas Advent Calendar


Each morning during December until Christmas Eve your small person can take a ball of cotton wool and stick it on his beard using  glue stick.  When the beard is complete that means ITS CHRISTMAS!!!!


We've also been making Christmas cake and chutney ready for Christmas hampers.  Mill was less than impressed with the colour and texture of fruit cake.


Wednesday, 31 October 2012

Making Christmas, making Christmas

lalala

Yes, its still October and yes, I've said the C word.  I admit that I'm a bit of a Christmas maniac - I'm the type of person to put a tree in every space of our house and I fully intend to infect the small one with this fever so by the time she is a women in her 30s she will still get excited at the first holidays are coming advert on the tv.

We've actually been quite busy crafting over the last few weeks on Christmas gifts from Milly, but nothing is finished.  This is one of those spanning lots of weeks project so you will have to come back if you want to see the final product.  Its the lord of the rings of craft projects, if you will, only with fewer potential endings and no elves.  Ok, maybe elves.

Not bread again


...said Milly when I announced we were making salt dough

1 cup flour plus some for rolling
1/2 cup warm water
1/2 cup salt
1 tbsp oil (optional - I find it makes the dough easier to work with)

to make that in to a Christmas decoration

absolutely anything to cut out a shape
absolutely anything to make impressions in the dough (optional)
a rolling pin
assorted paint (we used a metallic paint from tesco, a gold glitter paint from ELC and some white paint from asda)
a decision on how to hang it and either rings or string depending on what you choose


Mix everything together and that's it really!  If its too dry shove in some more water, too wet add flour.  

We decided to make some impressions in the dough using some snowflake cutters I had for last years Christmas cakes and then cut out shapes with cookie cutters, but you could use just about anything really - finger print impressions and a circle cut using an egg cup would be great.


Once cut decide how you're going to hang them.  We're trying a combination of ribbons which require cuts in the shape, string requiring a hole (I used a cocktail stick to form this), and rings which I will buy at some point in the next couple of days and glue in place.  We had rather a lot of dough left at the end of our cutting so we made little beads too so miss can have a princess necklace.  Not sure Kate would wear a salt dough necklace but you never know.

Salt dough Christmas decorations


There are lots of cooking instructions on the web for salt dough.  I normally bake mine at 100 degrees for 3 hours (or until they are firm but not coloured in any way) but I wanted to try the microwave method.  For this you apparently simply place in the microwave for 1 - 2 minutes and bing they're done. Unfortunately I bing almost set my microwave on fire and bing made my kitchen smell of bonfires.   If you know how to do this without causing a major crisis then go for it.

Once cooked and cooled, its time to paint, and that's what today's activity was for us

Witch costume also optional


Next I will varnish them and then we will put them all together and attach them to the labels we've made (instructions coming soon).  But that's an activity for another day!  One without witches I imagine.


Tuesday, 16 October 2012

When rhyming goes wrong

Milly loves rhyming and will happily sing song her way through bizarre combinations of words, birds, sirds, flubberlerds.  Many make absolutely no sense but its cute to listen to, until it goes very wrong and then you have to not react to luck, suck, duck f... you see where I'm going with this.

So today we're making food that has no rhyming risk factor.  I have a feeling this may become a theme over the next few weeks, or until the next phase hits.  Please dont let it be a reoccurance of "where do babies come from?".

Nice Ice Rice Flice Buns Huns Suns Guluns


1 batch of basic bread mixture recipe here 
75g sugar
1 egg

Icing sugar
Food colouring
Assorted sprinkly goodies.

Extra flour for rolling.
Vegetable oil to prevent the bread sticking


Make up the basic bread mix with the sugar and egg added.  Alternatively take any white bread mix / recipe and add the sugar and egg, leave to prove in an oiled bowl for 30 minutes.

Remove the dough and smack around a bit.  Make tthhhhhssssss noises at the same time.

Divide in half, and then divide each half in to 5.  Hand over to your miniture person and have them split each portion in half and form a ball shape.  Dont expect equal quantities but its nice for them to learn the concept of half and double.  Roll each ball in to a sort-of-sausage.  Its much easier for them to roll the dough (which is rather sticky) if you get them to flour their hands slightly before you start.

Milly demonstrates a dough sausage

Add each sausage to an oiled tray, cover with oiled clingfilm and leave in a warm place to double in size before baking in my oven at 170 degrees for 10 minutes.  Keep an eye on them - they do cook quickly so can turn just as fast.

Remove and allow to cool completely.  Open every door and window in your house so everyone gets a chance to smell freshly baked bread.  Pat yourself on the back for making the neighbourhood jealous.

Make some thick icing for the top - we went for tiffany blue and bubblegum pink (see, I can be foody when I want to be).  Pour on to a side plate and press each bun in to the icing.  Top with funky sprinkles and shove in the fridge to allow the icing to set.  Eat the left overs.


Scoff, cough, loff, bo....maybe not.

Toddler made ice buns


Wednesday, 12 September 2012

You have to ask the right questions.

Question : Would you like to make pastry Milly? 
Answer : In a minute.

This is basically how the first hour of our morning went.  Honestly it was my fault because at some point in time I asked if she wanted the Disney channel on and Jake and the Neverland Pirates is always going to superior to anything I say. I turn in to an adult from those Charlie Brown and Snoopy cartoons as far as the small one is concerned.   I thought I made perfect sense but her toddler ears were hearing whaaaa whaaa whaaa.  So a change of tact was required and instead it became:

Question :  Would you like to make pastry, then we can put it in the fridge to go cold enough for you to roll out and cut in to shapes?
Milly translation : whaaaawhaaaa whaaaa roll whhaaaawahhhaaaaa cut out  whaa

but I used enough child friendly words in my overly long question to break through the power of the cartoon and away we went.


Whhaaaa whaaaa apple pie


 For the shortcrust pastry

100g plain flour
50g softened butter (it really does need to be butter, so set a reminder to leave it out)
20g icing sugar
1 egg

For the filling

2 - 3 medium eating apples
2 tbsp sugar plus extra for sprinkling over the top
1 tsp vanilla extract
Rind and juice of 1/2 orange


To make the pastry sift the flour and sugar together, add in the butter and get your hands in there!  Rub the butter and flour between your fingers until it looks like squashy sand which smells nice.


Add roughly half the egg and bring the pastry together with your hands.  Wrap in clingfilm and bung in the fridge for half an hour.

Watch an episode of Jake and the Neverland Pirates.  By the end of that it should be time to...

...finely chop the apples and place in a bowl.  We didn't cook these, mainly because I prefer the texture of whole chunks of apple rather than apple puree, so they need to be pretty small.  If you want to cook the apples, then chop whatever size you want and cook with the orange juice and vanilla.

Add the rest of the ingredients, stir well and put to one side.

By this time your pastry should be nicely chilled so remove from the fridge, flour your surface and hand over to your small person to have fun with a rolling pin and assorted cutters.  

Once you've finished the rolling stage give the apples another stir.  There is going to be a lot of liquid at the bottom of the bowl so drain some off if you have a dive in there toddler who doesn't care about soggy bottoms.

We decided we were going to make decorated free form pies simply because they're easy to do.  Whatever you choose, cut your pastry to suit the case and fill with the apple mix.  Top and brush with the remaining egg.  Sprinkle on the sugar (or sugar and a touch of cinnamon) and bake for 20 - 25 minutes at 160 degrees in my oven, or until golden brown.

To make free form pies just cut the pastry to size for your toddler once they've finished rolling and they can do the rest.   Under 2's will need a little more guidance but its still a great one for them to assert a little independence in the kitchen.  Push the pastry in to the case, slightly over fill and then push the pastry back over the filling.  Decorate with pastry shapes.


Free form apple pie


With the remaining pastry Milly made an apple tart for Areal who, being a mermaid princess, prefers them to pies.  She also has a fondness for toffee ice cream.

Apple tarts


I could cook apple pies all day every day.  Its one of the first things that I was taught to cook as a child by my grandmother.  One day I might make a pie that tastes as good as hers.

Monday, 6 August 2012

Its the future

The whole family was home for lunch today.  His lordship had a call to make which meant keeping the small one busy for the duration and the whole thing was a bit unexpected so I hadn't prepared a craft for us to do. 

Like many kitchen dabblers, I have a few go-to recipes that I know work and are reasonably easy to throw together.  One of mine is banana bread and I happened to have a load of over ripe bananas that needed using up.  I've been using the same recipe for years despite being tempted by talk of chocolate banana bread so today was the day I decided to mix it up a bit.  Whats the worst that can happen after all.

Of course, if it was terrible I would take all of the blame and not suggest that a 3 year old in the kitchen isn't always going to produce great food.  *ahem*

Chocolate Banana Bread - Cake Style

125g soft butter (or fat of your choice)
180g soft brown sugar
2 eggs
300g plain flour
1 tsp baking powder
1 tbsp unsweetened cocoa powder
125 ml milk
1 tsp vanilla extract
50g chocolate (we used milk but dark would have been much nicer)
3 bananas
pinch of salt

Melt the chocolate (I did the microwave for 45 seconds method) and set aside to cool slightly.

Beat together the sugar and fat until well combined and then add the eggs, one at a time.

Combine the flour, salt and baking powder in one bowl and the milk, mashed banana and vanilla in another.  Sift in half of the flour and mix well.  Once combined add in the milk and mix again.  Add the remaining flour and mix.  This will result in a large amount of gloop so prepare for volcanic levels of overspill if you don't have a large mixing bowl.

Milly mixes chocolate banana cake


Put approximately half of the mix in to another bowl and mix in the cocoa powder.  Resist the temptation to pour the melted chocolate straight in to your mouth and add it to the mix instead.

Spoon blobs of the chocolate and non-chocolate mix in to a prepared baking tin and marble by running a kebab stick / knife / dinosaur tail through the lot.


Lick the spoons, bowls, whisk - basically everything.  This mix is lush.

Cook for an hour in my oven at 160.

Normally we eat banana loaf warm.  This cake is much much better served cold.  

Chocolate banana cake
Cutting it with a butter knife will result in a messy slice of cake


Milly decided she wanted to make a round cake, so you will need to adjust this recipe if you're making a standard loaf.  I normally bake my loaf for an hour and then foil the top and continue to cook for about 20 minutes.  I also add about 25g more flour and if I made this again I'd probably bung it in.


Wednesday, 1 August 2012

Getting Five a Day

"Would you like to make cakes with vegetables Milly?  Does that sound like fun?".
"No".

In my head, that conversation went a lot better.  I imagined a startled response, curiosity piqued by the potential of adding something savoury to a normally sweet product.  Then I remembered that Milly is three and knows that I talk mostly nonsense.  FACT.   Still, I want to encourage her to explore food a little more so we're making vegetable based and this *will* be fun.

Mother Knows Best Vegetable Cakes

Carrot & Orange

1 large egg
90g golden caster sugar
50ml vegetable oil
100g self raising flour
1 tsp mixed spice
1 carrot
1/2 tsp vanilla extract
Zest and juice of half an orange

Mix together the egg, sugar, oil and orange juice.  I gave Milly the first try at the hand blender.  Unfortunately using a blender is difficult with both hands over your ears so I did that part for her instead.

Fold in the flour, spice, grated carrot, vanilla and orange zest.  Laugh to yourself about what it would be like if you used old spice instead of mixed spice.  Wonder if this is the onset of madness.

hat optional

Divide in to 6 large muffins or mini loaf cases and bake in my oven at 160 degrees for 20 minutes.


Whilst you're waiting for these to cool, it gives you time to bake

Chocolate & Courgette

1 large egg
2 tbsp vegetable oil
75g golden caster sugar
120g self raising flour
1/2 tsp baking powder
1 1/2 tbsp unsweetened cocoa
1 courgette
handful of chocolate chips (optional)

Mix together the egg, sugar and oil in a bowl.   


Its a day of firsts and courgette is a lot soften than carrots so Milly got to grate her first vegetable.  Add to the mix and smile at how proud your child is with themselves.


Mix in the flour, cocoa, baking powder and chocolate chips if you're using them.  Doing the usual dance is also optional.


Cook as with the carrot cakes.


Once these come out of the oven you can frost (or not) the carrot cake.  We went for orange cream cheese frosting (recipe).

Carrot Cake Squares with Orange Cream Cheese Frosting.


The chocolate courgette cakes can take quite a lot of sweetness.  If anything they need it, so we went with a mixture of vanilla frosting and strawberries.  If I had it in, I would have gone with a white chocolate ganache instead.

Mini Chocolate Courgette Cakes


Wednesday, 18 July 2012

L-O-V-E Love

6 years ago I made the invitations to our wedding celebration.  Hoarder that I am, I still have most of the things I bought for them including a small heart paper punch and they're all kept together in one of our kitchen larder units which has been taken over by craft items.  Milly spotted it for the first time and, silly woman that I am, I showed her how it worked.  Of course these objects are not made for the finger strength of a 3 year old so I punched a few hearts for her.

DO IT AGAIN!!!!!

I decided that if I was going to punch holes in to ever item of paper in our home we may as well do something with it.

All you need is love


...and a heart shaped paper punch
and coloured paper
and something to mount them on
and glue
and a pencil 

Punch so many hearts out the coloured paper that you lose the feeling in your thumb


Draw a heart shape on to your mounting material.  We used black foam because its what I had to hand.

Fill the heart shape with glue and stick your little hearts in place.  Smaller children might need some help with the heart outline.  Continue until you have filled all spaces with mini hearts.

We decided to frame our picture, but it would work really well on a card.  If you have more time then a series of hearts on a large card would make a lovely picture.


Here Comes the Sun

do do do doooo


You know how you go to the loo and the phone rings, or you buy the dress you've been looking at for ages only for it to go in to the sale the next week?  We're talking about the sort of thing Alanis Morissette would turn in to a mislabelled song.  Well, today I am daring Mr Sod to do his best with that law. 

Its been months since I was able to hang out a full load of washing without sky watching and keeping my fingers crossed the rain would stay off long enough for it to dry, so I am certainly not in need of enough pegs to fill my line.  If we suddenly find that summer hits next week you know who to thank.


When is a peg not a peg?

You will need:
Assorted wooden pegs
Paint and brushes
A black marker pen
Assorted glitter, glue, sequins, gems (optional)
A plastic plant pot, empty tin or cardboard frame shape (optional)

Take whichever item you are going to peg (the pot, tin or frame) and work out how many pegs you will need to cover the area completely.

Set out all of your pegs and paint assorted designs on them.  If you have time then paint them on both sides and on the inside.  Ours is a bit limited today but the beauty of this is that you can always unpeg them and do more another day.

Once they are dry, outline any painted shapes with the marker and add the embellishments as required.


Clip in place on your chosen item.  Alternatively use on a ribbon / string notice board, attach a magnet to the back and use as a picture / note holder or glue on to a baton to hang small items from (ideal for childrens necklaces and bracelets).

We turned ours in to a paint brush pot


At some point we will take them all off and paint the inside, but thats a craft for another day.

Wednesday, 16 May 2012

Be Prepared

I never attended brownies or guides as a child.  The lack of brown owl in my life is quite clear, poor hard-done-by that I am, in my complete inability to prepare properly for the things I have planned.  Most of the time my cupboards are stacked well enough for me to get away with it but this week was my first Mummy and Milly Day disaster.  The weekends baking (I didn't photograph it all) resulted in the use of 24 eggs so, of course, this morning I was completely out and therefore the planned orange mini loaf was not going to happen.  Tears were threatening from Mill so it was over to my backup recipes and no eggs means just one thing to me - biscuits.  We had those cookie cutters I bought a couple of weeks back too so Milly was a very happy girl.

Disaster Saving Biscuits

40g golden caster sugar
135g plain flour
1 tbsp unsweetened cocoa
85g butter or margarine 
Juice of half an orange

Cream together the fat and sugar.  You don't need to go OTT with this but get the fat as soft as possible.   If you're well prepared and you've got the butter out in advance it should be soft enough to let your child do this bit.  Ooops.

Sift in the flour and cocoa powder (you already know the best way to do this) and mix with a fork until it starts to come together.  Pour in the juice and mix a little more.

Now for the fun bit.  Get your hands in and bring it all together until you have brown playdoh.  If its still a bit wet and sticky at this stage throw in a bit more flour, too dry and add a touch more orange.  You want something that looks like a big ball of soft yum rather than something that covers your hands in goo or breaks into little crumbs.

For under 2's get it to this stage and then hand it over for them to have some fun with rolling and cutting.

Flour your work surface (throw in a bit of cocoa if you care about white flour on chocolate biscuits - we don't so I didn't) and roll out your dough until its around 1/2 cm or there abouts.  Cut out whatever shape you want


Add the shapes to a tray covered in greaseproof paper.  They can be reasonably close together because they aren't really going to increase in size.  Bake for around 10 minutes and allow to cool on the tray for around 10 minutes.

Childrens chocolate biscuits

Once cooled, decorate in any way you wish.  We went with orange icing (3 tbsp icing sugar mixed in with a few squeezes of orange juice to make a thick paste), assorted sprinkles, mini fudge pieces and fresh strawberry slices.  These would be lovely made in to a sandwich with a chocolate filling.

Unintentional Dora Face-Palm


Who needs eggs and brown owls anyway.

Wednesday, 9 May 2012

Is this my lunch?

I was running solo in the supermarket this bank holiday Morning (I sure know how to have a good time).  Milly was swimming with daddy so I actually had the chance to take a look around instead of behaving like I'm a supermarket sweep contestant.   As a result I came home with a hand mixer, a huge bag of cookie cutters in assorted shapes and the joy of knowing that I will never again get arm strain from mixing frosting.  Its good timing because I'm baking some charity cakes at the weekend and there are 48 of those bad boys to frost.

Unfortunately Mill decided this morning that, in addition to her normal breakfast, she wanted toast with assorted toppings (one with butter, one with jam, one with cheese and one with cheese and jam - I kid you not) which she then faffed with for an hour so our planned use of cutters will have to wait until next week.  However, I still wanted to use my lovely new mixer and I had peanut butter in.  Its a no-brainer really.

There is nothing finer in life than cookie dough

120g plain flour with 1 tsp baking powder or self raising flour
40g brown sugar
40g caster sugar
1 egg
2 tbsp smooth peanut butter (thats what we had, use crunchy if you want)
2 tbsp (or more) chocolate chips
zest of half an orange (trust me - it really lifts it)
50g butter or marg

My oven : 160

Cream together the butters and sugars with my lovely new hand mixer.  Divide the metal thingies between the two of you and lick them clean.  When asked, this is not the childs lunch.

Whisk the egg and add that to the creamed mix.  Make a face like youre sucking lemons when asked if they can taste it at this stage.  Stir in the orange and chocolate.  Repeat face.

Shake shake sifting dance in the flour (and baking powder) and mix well.  Now you can taste it.  Remind yourself that this definitely is NOT your lunch regardless of how much you want it to be.  Lick the bowl and any spoons anyway.

Now its entirely up to you what you want to do with the mix.  I took approximately a tbsp of mix, rolled lightly in to a ball and flattened slightly on a tray but you could just blob it on if you want to.  Make as large or as small as you want - its an anything goes cookie.

Bake for around 20 minutes or until brown.  

Chocolate peanut butter cookies


This could be your lunch if you wanted.  I'm not the food police and there are days when I want nothing more than a tube of pringles and a pot of garlic dip.  Besides, it has orange in it so its practically fruit.

Despite their obvious goodness, we had them for pudding.  For lunch we went with muffin pizzas, which are great fun and a regular part of toddler diet in this house.

1 English Muffin per child (the other half can go through 3 without a problem)
Any form of pizza sauce or ketchup (for fussy veg haters cook up a tin of chopped tomato, finely chopped carrot, courgette and celery, reduce and then blend - I used to freeze this) 
Oregano
Black pepper
Mature cheddar cheese
Pizza toppings

Cut each muffin in half and toast slightly.  You dont really want any colour here, just to firm them up.

Hand over to the small one and let them have fun.  Expect mess.


Milly decided on ham, olives and sweetcorn today.  Shove under the grill for about 10 - 15 minutes or until the cheese is bubbling.

Mini muffin pizza


This is definitely your lunch Milly.


Wednesday, 25 April 2012

Never trust pink icing

A while back we subscribed to the Dora the Explorer little cooks magazine.  Its had a bit of a shaky start thanks to missing deliveries and broken free gifts, but otherwise its pretty good.  Unfortunately, the small one is rather set in her ways so trying to get her to try a new recipe often requires more ability than I possess (which is why we made chocolate cake every Wednesday for weeks on end).   As a result, we have made the same recipe for Dora muffins 4 times now with slight variations on the recipe each time.  This is todays effort, and very little like the original (sorry Dora).

Dry stuff - wet stuff - make some muffins << repeat >>

I understand that title will mean nothing to those who haven't felt like their head may explode listening to Dora on tv.

For the muffin:
100g self raising flour
2 tbsp vegetable oil
1 egg
75 ml milk
handful of raspberries
white chocolate bar
30g golden caster sugar

For the frosting:
tbsp soft cheese
tbsp butter (softened)
food colouring
vanilla extract
icing sugar

lots and lot of cleaning equipment

My fan oven temperature : 160

Prepare and weigh all the ingredients in advance.  I find my daughter has the patience of a die hard shopper on next sale day so this works best with her.  It also gives her the chance to do her "comedy" which way does the spoon go routine.


Chop the white chocolate in to chunks until you have a good handful (or more - depends how much you like your chocolate) but leave some to finish.

Whisk the egg in a jug and add the milk and oil.

In another bowl add the flour, sugar, chocolate and raspberries, and stir.  Add the wet ingredients in to the dry and mix together with a fork.

Now this isn't the method I would use with a recipe aimed at older children or adults, but this thing is getting mixed to death so throwing it all together means you wont have something that resembles a rock once cooked.  You also get mushy raspberries which are hilarious.  Apparently.

Divide between 4 muffin cases and cook for about 15 - 20 minutes.

Once cool mix together the soft cheese, vanilla and butter.   Then add enough icing sugar to thicken.  Ask your child what colour icing they would like, even though you already know the answer (in our world, everything is pink) and turn the frosting a horribly unnatural colour.  Hand the icing over to the child who will splodge it all over the cake, all over themselves and all over every work surface you can see.

Top with grated white chocolate and shove in the fridge for 10 minutes to allow the frosting to set a little.


Wonder why you bothered to make muffins since your child is only interested in licking off the frosting.  Hey ho.

Monday, 23 April 2012

101 things to do with tissue paper flowers

Well, 2 to be exact.

This might even be better than the basket.  Surely not, I hear you cry.  Read on crafters...

Least practical hat in the world

At some point in toddler life there will be a requirement to make a hat for some sort of easter, summer, the local paper is sending around a reporter festival.  Plastic flowers are expensive so we took to the tissue paper again and prayed for a dry day.  Now, you dont want any common or garden tissue paper flower hat for your child.  What you want to do is add bees! 

One hat of your choice
Assorted tissue paper flowers
Polystyrene balls
Kebab sticks and playdoh (this is just to hold the balls, so anything pointy will do)
Yellow paint
Black pen
White paper
Pipe cleaners
Glue
Needle and thread

Shove a kebab stick in to the end of three polystyrene balls and hold in position with the playdoh.  Smile at the level of concentration on your childs face as they paint these balls yellow.

Milly paints bees
Milly paints bees

Once dry, draw a black stripe across the body, cut out some wing shapes on paper and glue in place.  Depending on the age of your child you may have to do the cutting and striping for them.

Attach your wonderful paper flowers around the edge of the hat and green paper "but flowers need leaves mummy".  Add an assortment of rubbish that your child insists must go on the hat.

Shape the pipecleaner as you wish and then shove one end in to the bee.  You might need to glue this in to place.  Sew the other end of the pipe cleaner to the hat and you have this

Easter bonnet

and yes, the hat made it in to the local paper with one grumpy looking child under it.

A bunch of flowers to last a lifetime, or this ones for the dads

The natural progression from the ability to make a tissue paper flower has got to be making a bouquet of them.
Tissue paper flowers
Green tissue paper
Drinking straws
Glue

if you want extra daddy points, add a vase

Empty toilet roll
Tissue paper
Glue mixed in with an equal quantity of water

The flowers:

Make a 5 or 6 large multi coloured flowers.  Let your children use their imagination when it comes to the colour combination.  Reality isnt the keyword for this project.

Wrap a length of green tissue around a straw, leaving some excess at the top and glue to secure.  

Stick the flower to the excess green tissue.  Gasp in amazement at the wonder you have created.  Do it until all the flowers have stems, gasp each time.

The vase:

Rip up shreds of tissue paper and stick in to place with the glue-water combo.  Continue until all of the roll is covered and leave to dry (which with a toddler means hunting around for a hair dryer and using that).  Place the flowers in to the vase.  Add an assortment of rubbish that your child insists must go on the vase.


Saturday, 21 April 2012

You can never have too many baskets

Has anyone in the known world ever said this?  I doubt it.

Tissue paper flowers that dont smell of tissue or flowers

Cut out two circles of tissue paper in different colours, one slightly smaller than the other, plus one circle of yellow or orange tissue whilst your child asks if its ready yet over and over again.

Make a cup of tea and put your feet up.

It is ready now.  Hand over the circles plus glue, glitter, sequins - anything you fancy really and allow them to get to work.  Glue the smaller circle on to the larger one, scrunch the yellow into some sort of ball and glue to the middle.  Add as much glitter and other junk as needed to make the worlds most freaky flower.  Pinch behind the yellow tissue and set to the side to dry.  Repeat.

Once they have the hang of flower making there is no end of things they can do with these.  Stick to the front of a card, add to ribbon for floral bunting, use on gifts...because, after all, you can never have too many baskets


Wednesday, 18 April 2012

In preschool they have jam

"Scones dont have cheese in them, they have jam".  At 3, Milly is an expert in everything.  In her head, I know she says "FACT" at the end of every sentence as she rolls her eyes at my utter ignorance.  I explain the difference between savory and sweet scones and I think I may have won this battle for now.

The reason for this discussion is a recipe I've had for a while for cheese scones.  I cant remember where it came from now, somewhere from the web I imagine, but it uses American cups which I've never really got my head around.  I've kept it because, unlike traditional scone recipes, it uses oil instead of butter which makes it easier for little fingers to do solo.  A recent trip to the supermarket and an offer on various cooking equipment meant I could finally try it out.  So here it is:

Jam free cheese scones

2 cups plain flour
3 tsp baking powder
1/4 tsp salt
1 cup mature cheddar cheese
1 egg
140ml full fat milk (use semi skimmed if thats what you have)
3 tsp vegetable oil

Preheat the oven.  I put our fan oven on at 170 so adjust accordingly (sorry, I only know my own oven!)

Stir together the sifted flour, baking powder and salt in a large bowl.  The recipe calls for a cup, but Mill decided she was going to squash the grated cheddar in so we probably ended up with closer to 1 1/2 cups minus the bits that she decided were ok to taste.  Stir into the flour.

In another bowl mix together the egg and milk (retain a little to brush over the tops) and add the oil.  Convince your child that licking the whisk would be a bad idea.

Close your eyes and allow your child to pour the wet mix into the dry.  Exhale once the process is complete.  Mix together with a fork before getting your hands stuck in.  Add euuuuuuuuuggggggggghhhhh sound effects.

Once you have a dough, turn out on to a floured surface and squash until it is about 2cm thick.  Double back on to itself and squash a little more.   Cut using an upturned glass and place on a baking tray.

Paint the top of the scones with milk and give each a grated cheese hairstyle.

Put the scones in the oven and do the dishes before madam insists that being a frog and hopping around the kitchen is a good idea.  This should last about 20 minutes by which time the scones will be firm to the touch, and a lovely golden colour.  Break open (the folding should allow you to do this), spread a little butter and a slice of cheese and enjoy warm.


..."Scones have jam, this is a burger".  *sigh*